Handmade touches sprinkled throughout our house make it feel more like a home and certainly bring smiles to my kiddos!
I always find our house to be a little sad and in need of some cheer after we take all the Christmas decorations down...so if you're like me and want to add a splash of color and some fun to your late winter decor, maybe you'll find this little tutorial helpful!!
 and if you've visited Sassy Babies in the past, you may have seen some banners I made for the shop a few years ago! Banners are also great for birthday parties and festive occasions! And best of all, they are sooo easy to make! So let's get started!! We just had a baby boy and after two girls, the nursery desperately needs some boy decor, so I'll be making a banner for his room in this tutorial!
you will need:
-a sewing machine (all you need is a simple straight stitch, so you don't even have to have a fancy machine!)
-fabric (yardage amount will depend on how many different prints you'd like to incorporate and how long you'd like your banner to be...rough guess--if you have 1/4 yard of 6 prints, you'll be able to create a 3 foot banner (9 yards)
 aren't these just the cutest fabrics by the way!
-one package of double fold bias tape (or two if you'd like a longer banner!)
 i love making my own bias tape and getting to use fun prints but store bought packages work just as well!
-thread in the same color as your bias tape

-pinking shears (if you like the jagged edge look to your pennants)
-I like to use my rotary cutter, straight edge and cutting mat, but those aren't necessary

-a room or wall or party that needs a little pop!
alright, here we go!!
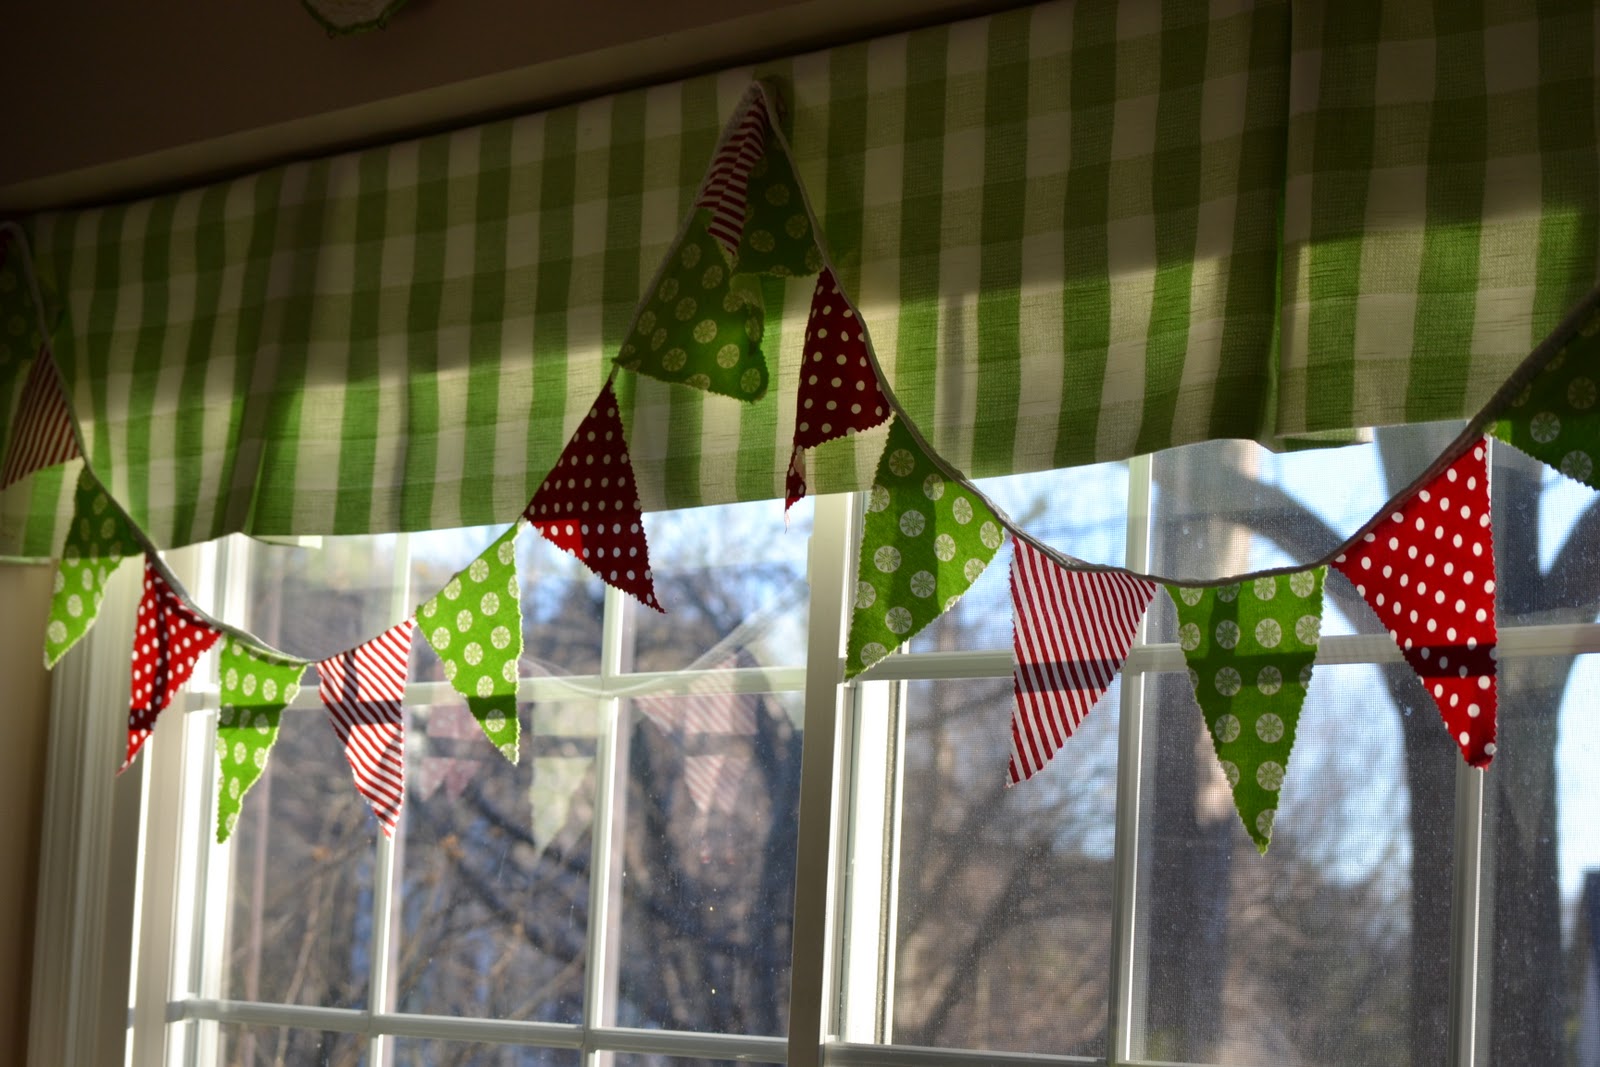
-I decided to do without the pinking shears this time around and just made straight edge triangles for my pennants... so layout one of your fabrics and cut a triangle in the shape and size you'd like...for this banner, I cut my triangle like so:
 about 10 inches per side.
-once you have that piece cut, you want to be sure all the pennants are that same size, so fold that pennant in half and use it as your template to cut all your other pennants out of each of your other fabrics...
 cut, cut, cut until you have all the pennants you would like!
  I like to divide them by prints and then stack them up in the order I'd like them to be positioned in the banner...
-unfold your bias tape and insert your first pennant an inch in from the bias tape edge.
-fold the edge of the tape inside itself so no raw edges are exposed.
 pin.
pin.- then pin your pennant into the fold, making sure to catch the entire top of the pennant and both sides of the bias tape.

-continue pinning the pennants into the bias tape...you don't have to pin them all in at once, but can pin then sew and then pin again until the banner is complete.

-finish the end of the banner in the same way you began it...by enclosing the raw edges--just fold the bias tape in on itself and sew to secure with back stitching. Once you reach the length you'd like--you're done!! Go find a wall and hang up that beautiful banner!! I usually use push pins to secure the banner to walls or ceilings!
 you can see more pictures of our little guy's almost finished room
Thanks for reading this tutorial!! If you have any questions or want to share your projects, feel free to email me at chickadeechickadee at gmail dot com
No comments:
Post a Comment